Category Archives: Post

Post Production is post and prior—a lot of work taking other people’s material from dozens of sources and fitting it all into some other group’s needs. Very technical.

Light Illusion IBC Show Specials | Probes and Software

To order any of the following offers please e-mail: [email protected] stating the item requirements.
A quote for payment will be provided, with payment to be made via a bank transfer.
(PayPal payments are possible for an additional fee of 3.5%)
Please note some locations may incur a supplemental hardware shipping fee – this will be defined when a quotation is supplied.

LightSpace CMS Professional Discounts

LightSpace CMS Software – unlimited license availability, until end of IBC show
LightSpace XPT – Book price: £2,175.00 – Discount price: £1,087.50 – Discount value: £1087.50 – Discount percentage: 50%
LightSpace PRO – Book price: £1,875.00 – Discount price: £1,125.00 – Discount value: £750.00 – Discount percentage: 40%
LightSpace CAL – Book price: £1,275.00 – Discount price: £828.75 – Discount value: £446.25 – Discount percentage: 35%
LightSpace LTE – Book price: £525.00 – Discount price: £367.50 – Discount value: £157.50 – Discount percentage: 30%

LightSpace CMS Home Cinema Discounts

LightSpace CMS Software – unlimited license availability, until end of IBC show
LightSpace HTP – Book price: £1,125.00 – Discount price: £675.00 – Discount value: £450.00 – Discount percentage: 40%
LightSpace HTL – Book price: £375.00 – Discount price: £262.50 – Discount value: £112.50 – Discount percentage: 30%

If any of the above software discounts are to be combined with a LightSpace CMS upgrade, say from LightSpace LTE to LightSpace XPT, the discount percentage will be applied ‘after’ the upgrade cost is calculated, as stated on the Support pages of the website.

Probe Discounts

Klein Probes – three (3) units available each model, until end of IBC show
Klein K10-A – Book price: £5,482.00 – Discount price: £4,385.60 – Discount value: £1096.40 – Discount percentage: 20%
Klein K80 – Book price: £3,971.00 – Discount price: £3,176.80 – Discount value: £794.20 – Discount percentage: 20%

Jeti Probes – unlimited unit availability, until 17th October
Jeti Spectraval 1501 – Book price £4,859.00 – Discount price: £4,081.56 – Discount value: £777.44 – Discount percentage: 16%
Jeti Spectraval 1511 – Book price: £6,185.00 – Discount price: £5,195.40 – Discount value: £989.60 – Discount percentage: 16%
Jeti Specbos 1211L – Book price: £6,516.00 – Discount price: £5,473.44 – Discount value: £1042.56 – Discount percentage: 16%

basICColor DISCUS probe – three (3) units available, until end of IBC show
basICColor DISCUS – Book price: £746.00 – Discount price: £671.40 – Discount value: £74.60 – Discount percentage: 10%

X-Rite Probes – unlimited unit availability, until end of IBC show
i1 Display Pro OEM – Book price: £227.00 – Discount price: £192.95 – Discount value: £34.05 – Discount percentage: 15%
i1 Pro 2 – Book price: £874.00 – Discount price: £742.90 – Discount value: £131.10 – Discount percentage: 15%

Signal Generators & Analysers Discount

Murideo Generator & Analyser – unlimited unit availability, until end of IBC show
Murideo SIX-G – Book price: £1,982.00– Discount price: £1,585.60 – Discount value: £396.40 – Discount percentage: 20%
Murideo SIX-A – Book price: £1,596.00– Discount price: £1,278.80 – Discount value: £317.20 – Discount percentage: 20%

LUT Box Discount

Murideo LUT Box – unlimited unit availability, until end of IBC show
Murideo Prisma – Book price: £793.00– Discount price: £ 591.20 – Discount value: £147.80 – Discount percentage: 20%

To order any of the above offers please e-mail: [email protected] stating the item requirements.
A quote for payment will be provided, with payment to be made via a bank transfer.
(PayPal payments are possible for an additional fee of 3.5%)
Please note some locations may incur an additional hardware shipping fee – this will be defined when a quotation is supplied.
Ubuntu/VirtualBox setup followup

When setting up VirtualBox there are two time sinks that one can be easily get trapped by.

The first is getting an Internet connection. In theory, the Internet link of the computer that you are setting the Virtual Machine onto will be automagically linked to. Open Firefox and off you go.

Yeah; until it doesn’t auto set up. Then, it is poking around until you find the right combination of not-so-obvious tricks. And here is a synopsis that I just had to find and go through, and which hopefully will save you some time.

  1. Shut down the OS. Leave VirtualBox running.
  2. Click onto the Ubuntu VM
  3. Up above or on the right panel, choose Network
  4. Click Adapter 1 and set for NAT
  5. Click Adapter 2 and set for Bridged Adapter, then select the adapter that has the link: e.g., en0, Wi-Fi (Airport)
  6. Click OK.

As long as that is open,

  1. Click on Ports
  2. Click on USB. Make certain that the USB 3.0 Controller is selected. 
  3. Click OK.
  4. When you have the Virtual Machine running, click the icon on the bottom right that looks like a USB plug. Select USB Settings 
  5. On the right side click the icon with a Plus (+) symbol on the USB Plug.
  6. Select a plugged in drive from the list. If the drive that you expect to be showing isn’t showing, it may have been captured by the computers native drive system. Every Operating System is going to have a little different method for disconnecting an attached drive. Technically, it is called an UnMount. It gets a 2nd dose of complication because you can’t just say ‘unmount’…you must say umt (or something like that) and the name of the drive…which you probably don’t know. 
  7. If you are only going to do this once in a while, go to your Disk Utility, find the drive on the list and click unmount.

At some future date, this article may be appended to include some more clues about unmounting, but this articles purpose was to get the 1st two points onto this virtual tissue.

Backgrounds of Sounds – Oscars

The scripts for this years Oscar contending movies have been available for a while (Oscar’s Scripts and Cameras), and now for it’s 2nd year is The Dolby Institute Podcast Series featuring Conversations with Sound Artists: 2017 Oscar Edition.

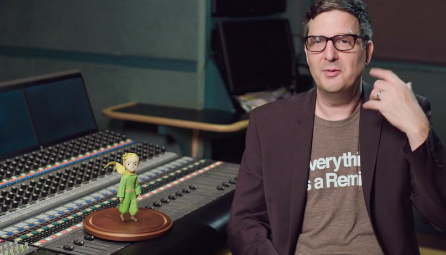
Sound Artists and The Little PrinceThese are a set of conversations with the sound artists who’ve been nominated for Academy Awards for Best Achievement in Sound Editing and Best Achievement in Sound Mixing. They are made in association with the Sound Works Collection which is also a not-to-be-missed set of recordings. Now, if you’re finished with bothering me, I’m listening to The Little Prince.

DCP Tools: Windows for Virtual Developers

And another: https://az792536.vo.msecnd.net/vms/release_notes_license_terms_8_1_15.pdf

Free means not activating the installation. There may be downsides to that, but most people in the ‘every once in a while for testing’ world won’t notice. It has long been the practice of Microsoft to allow users to test the OS before buying, but sometimes you just don’t know where to look through the forest of spam and trojan traps to find the One Safe One.

Good luck to us all.

Sound Immersion at AES

Great to see an article where Immersion doesn’t mean Immersive…Mel Lambert reports from the AES-LA 2016 for CineMontage, the Editors Guild Magazine.

The 141st Audio Engineering Society Convention, held recently in the Los Angeles Convention Center’s West Hall, attracted a record West Coast attendance, with a wide cross-section of brands showing their wares on the exhibition floor and companion demo rooms. Aimed squarely at evolving technologies via a special focus on new markets and trends, the four-day convention took the highly appropriate theme of Immersed in Audio. “That pretty well sums up where [our industry] needs to move forward in the world of new audio technologies,” noted AES president John Krivit. “Sound for picture, networked audio and game audio were all covered here with a full technical program of workshops, tutorials and exhibits.”

For more about the co-located Virtual Reality Convention and highlights from the seminars, see: 

Sound Immersion at AES – CineMontage

AES Los Angeles, 2016

Mel Lambert reports from AES-LA:

For a number of reasons – not least being the outstanding work done behind the scenes by its volunteer planning committee – the 141st AES Convention, which ended at the Los Angeles Convention Center yesterday, delivered on its promise. The four-day attendance was outstanding, with a good representation of overseas visitors, while a wide cross section of brands showed their wares on the exhibition floor and companion demonstration rooms.

The icing on the cake was the co-located Audio for Virtual and Augmented Conference, which drew standing-room-only attendance in a lecture theatre and companion paper room. The inaugural two-day event was expected to attract some 290 attendees; aggressive marketing and outreach to the VR and AR communities proved so successful that pre-registration had to be closed at just over 400…

For more of this Audio Media International article:

AES 2016: An overview of the key talking points

Technicolor Starting On the Long Glossary Road

Back in the late 80’s the digital transition grabbing the attention of engineers was in the broadcast business…no, in the post-production equipment business…no, it was in the potential of both…actually, memory was still expensive and processing power was still locked by unreleased new versions of the Motorola 68000 and other chips which drove everyone’s imagination with expectations of clever glued matrixes of parallel’d A/V ideas…most all failed as the latest versions didn’t arrive until too late – well, not too late for those companies who bought the dreamer companies for pennies on the dollar.

Notwithstanding that tangent, it was interesting times with new names and acronyms and uses for ideas – and the clever folks at Quantel issued their first industry glossary. It got better and better with each edition. The latest is the 20th Edition, released in 2015…and available at this link: Quantel Digital Factbook

There are plenty of other Glossaries at the DCinemaTools Glossary page.

Technicolor has started on the road to a new glossary named the Next Gen Premium Entertainment Experiences, which sounds like something that should be given out by the Event Cinema Association. Instead, it is pages of explanations of better bits. Click on the title.

Validating a DCP

To avoid black screens, the tech teams at the festivals do the yeoman’s work of cracking open recalcitrant DCPs and re-making them at the last minute. The artist may not even know that they should be relieved, and gets to the next festival believing…or saying, “Hey, it played at the last festival, it must be good.” Alas. Or they take it to a facility that specializes in subtitles likeTitra who is then forced to add a fee for remastering because they know that the old DCP won’t be accepted at a duplicators because of some error they are seeing. More alas, especially when it is going to cost time and money to find the reason for the error too.

One of those teams who have been providing tech support at large and high profile festivals for the past decade, such as the Berlinale, is zweiB, from the northern-most city in Italy – Munich. (This just in. Some are saying that Bavaria is part of Germany. Hmmm. Notwithstanding.) Their site has a tool named DCP-Validator which actually is a front end that humanizes a command line only tool named DCP-Inspect from Wolfgang Woehl’s Digital Cinema Tools excellent package of goodies. 

Just writting “…providing tech support…such as the Berlinale…” doesn’t do justice to the amount of work it takes to juggle hundreds upon hundreds of DCPs over a two week span at dozens of cinema screens. (Commercial cinemas, it should be added –  who don’t necessarily want to have working software/firmware changed just for the festival at night when they are playing regular schedules during the day, for example.) Likewise, describing DCP-Inspect as just an excellent package or listing a few features doesn’t tell of the years of keeping up with non-existent and moving standards. But here is a list nonetheless, taken from the zweiB’s site:

It is a tool for deep inspection and validation of DCPs. This includes integrity checks, asset inspection, schema validation, signature and certificate verification and composition summarization.

The GUI convinces with its user-friendly operation. Additionally, the Digital Cinema Packages are checked by its test functions for all DCI standards to ensure the playback performance on popular DCI players.

Putting a front end on this is a nice touch. It can print out a list of working DCPs and add a sense of calm in an otherwise rushing preasure situation. Making it available to us on an easy to use site with a running list of versions and fixes is a nice touch and extremely kind. The DCP Validator package works with the Ubuntu and Debian flavors of Linux. 

The article The DCP USB on a Mac; CineTechGeek to Digital Cinema Tools ends with using cinemaslides, another of the Digital Cinema Tools program. So installing DCP Validator is a very logical next step for a HowTo article.

…and easy to do.

Download a copy from the download page of the zweiB site, Zweib Download Site for dcp_inspect DCP Validator

Put the downloaded copy into your Shared Folder if you have downloaded it using your Mac or PC. Go into your Ubuntu installation and drag the installer package (marked at the end as a .deb file) onto the Desktop (or into the Desktop folder.) (This can all be done from the command line, but if you can do this from the command line, you don’t need any of these instructions.) It doesn’t have to be the Desktop, but the package will not install from the Shared Folder.

Right-Click or Command-click on the .deb package and open it using the Ubuntu Software Center…which will actually open if you merely double-click on the .deb file. Eventually the Software Center will put up an Install button, which you should click. 

Eventually the installer will ask for an admin password which, when given, will allow the installation to finish.

Reboot Ubuntu (or Debian.) This allows WebRick, a little webserver to run. DCP Validator runs on this webserver with your browser.

Open Firefox. Go to http://localhost:8080 – The Validator should come up. 

Click on the “Login” button. Type dcp, then click “Confirm”. You are now in the Admin area. 

(The online manuals show where and how to change the port number should you have something else running on 8080, and how to change the password if you into things like that.)

Click “Settings”. We need to put in the route for DCP-Validator to look for your DCPs on your hard drive. DCPs on a USB stick or USB drive will show up without this step. 

Click the “Add” button. If you know how to type in the root path, go ahead. Otherwise, open a folder using the Dock on the side, click on the Shared Folder, then hit the List icon on the top right if required. Manipulate your windows so that you can drag the folder containing your DCPs into the little Rootpath window on the DCP Validator page. If you are like me it will say file:///media/sf_shared_w_ubuntu/DCP_Finals. Erase the “file://” at the front, leaving the Rootpath as: “/media/sf_shared_w_ubuntu/DCP_Finals.”

Click the “Confirm” button. Click the “Back” button.

Click “Validate A New DCP”

Click on the /media folder line in the rectangle on the side.

Click on a DCP. Click on the DCP folder again. You’ll see the innards, the ASSETMAP, the VOLINDEX, and all the audio and video and reference files that make up the DCP. You should be able to hit the Validate button now. 

Click on “Validate” button. Make some coffee. Write a note telling me what was confusing about this or the DCP on a Mac article.

Pass? Green dot or Red? Click Show. Look at the report. Look at the levels. Balanced left and center? right and center? left and right? Surrounds look right? LFE? Cool.


If you followed James’ directions to a T, installing VirtualBox on the computer then Ubuntu as an iso drive, you can follow the zweiB manual to do the installation. Your USB drive should show right up on the list and things should be great without the step of showing the program of where to look.

And that is the end of this particular process.

The final version of the ISDCF document on Hard Disc Drive formats for DCP is just released, so download that from the ISDCF Technical Papers site.

Stay Standard. Do us all a favor, and Join SMPTE

BT.1886 Q&A – SpectraCal

When extended band-width in video is discussed, BT.1886 gets mentioned. What is it?

SpectraCal has a nice whitepaper on the subject.

Lest there be any confusion, SMPTE specifies a gamut, so this is not going to be in the DCI projector for movies for a while. But some clever cable box or satellite group might use it to make the darks better in an alternative content feed, for example.

10 Questions, 10 Answers – BT.1886